安装sonar Scanner
打开 官网
找到下面扫描器
通过这个扫描器可以分析代码分析
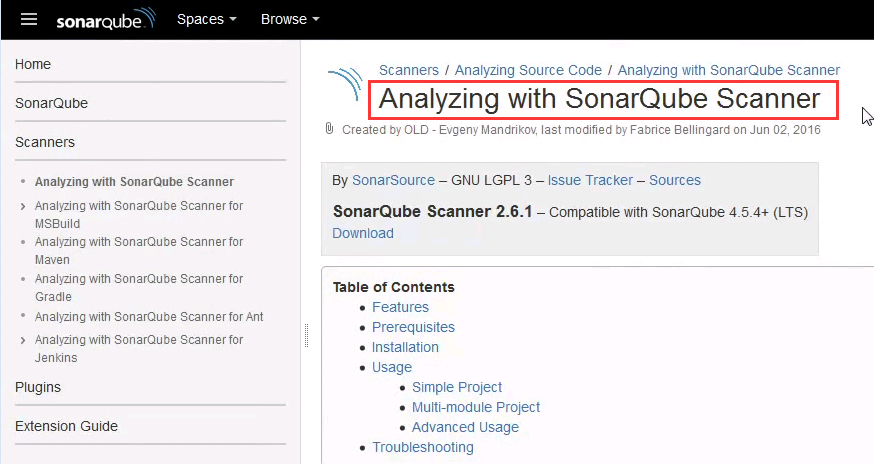
因此你也的安装这个扫描器

上传sonar-scanner-2.6.1.zip
[root@linux-node1 plugins]# cd /usr/local/src/[root@linux-node1 src]# lsmysql-5.6.30-linux-glibc2.5-x86_64.tar.gz sonarqube-5.6.zip[root@linux-node1 src]# rz -Erz waiting to receive.[root@linux-node1 src]# lsmysql-5.6.30-linux-glibc2.5-x86_64.tar.gz sonar-scanner-2.6.1.zipsonarqube-5.6.zip[root@linux-node1 src]#
下载中文插件包失败,可以通过迅雷下载

手动下载中文插件并上传到此目录下
[root@linux-node1 plugins]# pwd/usr/local/sonarqube/extensions/plugins[root@linux-node1 plugins]# lltotal 29180-rw-r--r-- 1 root root 128 Apr 11 2016 README.txt-rw-r--r-- 1 root root 7797781 Apr 7 2016 sonar-csharp-plugin-5.0.jar-rw-r--r-- 1 root root 3191477 Apr 28 2016 sonar-java-plugin-3.13.1.jar-rw-r--r-- 1 root root 1678073 Apr 7 2016 sonar-javascript-plugin-2.11.jar-rw-r--r-- 1 root root 3733262 Apr 29 17:26 sonar-php-plugin-2.10.0.2087.jar-rw-r--r-- 1 root root 3663678 Apr 29 17:11 sonar-python-plugin-1.7.0.1195.jar-rw-r--r-- 1 root root 3233128 Apr 7 2016 sonar-scm-git-plugin-1.2.jar-rw-r--r-- 1 root root 6564535 Apr 7 2016 sonar-scm-svn-plugin-1.3.jar[root@linux-node1 plugins]# rz -Erz waiting to receive.[root@linux-node1 plugins]# lltotal 29216-rw-r--r-- 1 root root 128 Apr 11 2016 README.txt-rw-r--r-- 1 root root 7797781 Apr 7 2016 sonar-csharp-plugin-5.0.jar-rw-r--r-- 1 root root 3191477 Apr 28 2016 sonar-java-plugin-3.13.1.jar-rw-r--r-- 1 root root 1678073 Apr 7 2016 sonar-javascript-plugin-2.11.jar-rw-r--r-- 1 root root 36538 Apr 29 17:34 sonar-l10n-zh-plugin-1.11.jar-rw-r--r-- 1 root root 3733262 Apr 29 17:26 sonar-php-plugin-2.10.0.2087.jar-rw-r--r-- 1 root root 3663678 Apr 29 17:11 sonar-python-plugin-1.7.0.1195.jar-rw-r--r-- 1 root root 3233128 Apr 7 2016 sonar-scm-git-plugin-1.2.jar-rw-r--r-- 1 root root 6564535 Apr 7 2016 sonar-scm-svn-plugin-1.3.jar[root@linux-node1 plugins]#
重启sonar,让插件生效
[root@linux-node1 plugins]# /usr/local/sonarqube/bin/linux-x86-64/sonar.sh stopStopping SonarQube...Waiting for SonarQube to exit...Stopped SonarQube.[root@linux-node1 plugins]# lsof -i:9000[root@linux-node1 plugins]# /usr/local/sonarqube/bin/linux-x86-64/sonar.sh startStarting SonarQube...Started SonarQube.[root@linux-node1 plugins]# lsof -i:9000[root@linux-node1 plugins]# lsof -i:9000[root@linux-node1 plugins]# lsof -i:9000[root@linux-node1 plugins]# lsof -i:9000COMMAND PID USER FD TYPE DEVICE SIZE/OFF NODE NAMEjava 43957 root 77u IPv4 195191 0t0 TCP *:cslistener (LISTEN)[root@linux-node1 plugins]#
重启后刷新页面,看到变成中文的了

代码规则这里
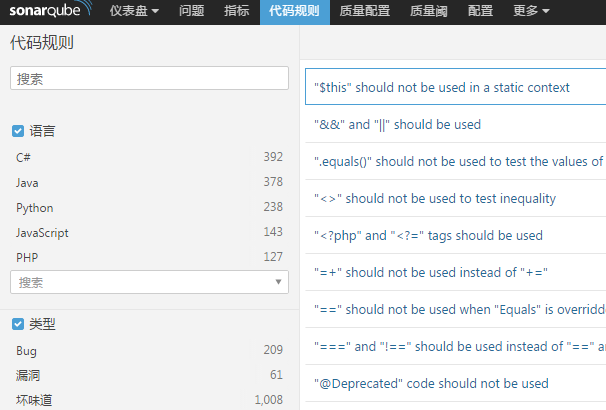
一些规则,都是些公共的用法,它会告诉你什么叫好,什么叫不好
装了语言插件才会出现对应代码规则

什么情况下算bug

坏味道,你的代码可能写的没错,但是不规范,风格可能不对。翻译的硬伤
sonar-scanner才是真正扫描代码的,它连接sonar之后,扫描代码,然后把扫描结果存入数据库,sonar界面进行展示
[root@linux-node1 plugins]# cd /usr/local/src/[root@linux-node1 src]# lsmysql-5.6.30-linux-glibc2.5-x86_64.tar.gz sonar-scanner-2.6.1.zipsonarqube-5.6.zip[root@linux-node1 src]#
解压和安装,并创建软链接
[root@linux-node1 src]# unzip sonar-scanner-2.6.1.zip Archive: sonar-scanner-2.6.1.zip creating: sonar-scanner-2.6.1/bin/ inflating: sonar-scanner-2.6.1/bin/sonar-scanner inflating: sonar-scanner-2.6.1/bin/sonar-runner creating: sonar-scanner-2.6.1/conf/ inflating: sonar-scanner-2.6.1/conf/sonar-scanner.properties creating: sonar-scanner-2.6.1/lib/ inflating: sonar-scanner-2.6.1/lib/sonar-scanner-cli-2.6.1.jar inflating: sonar-scanner-2.6.1/bin/sonar-runner.bat inflating: sonar-scanner-2.6.1/bin/sonar-scanner.bat [root@linux-node1 src]# lltotal 422960-rw-r--r-- 1 root root 314592758 Apr 9 13:38 mysql-5.6.30-linux-glibc2.5-x86_64.tar.gz-rw-r--r-- 1 root root 118012667 Apr 29 15:57 sonarqube-5.6.zipdrwxr-xr-x 5 root root 37 Apr 29 17:52 sonar-scanner-2.6.1-rw-r--r-- 1 root root 501750 Apr 29 17:16 sonar-scanner-2.6.1.zip[root@linux-node1 src]# mv sonar-scanner-2.6.1 /usr/local/[root@linux-node1 src]# ln -s /usr/local/sonar-scanner-2.6.1/ /usr/local/sonar-scanner[root@linux-node1 src]#
查看
[root@linux-node1 local]# cd /usr/local/[root@linux-node1 local]# lltotal 4drwxr-xr-x. 2 root root 6 Jun 10 2014 bindrwxr-xr-x. 2 root root 6 Jun 10 2014 etcdrwxr-xr-x. 2 root root 6 Jun 10 2014 gamesdrwxr-xr-x. 2 root root 6 Jun 10 2014 includedrwxr-xr-x. 2 root root 6 Jun 10 2014 libdrwxr-xr-x. 2 root root 6 Jun 10 2014 lib64drwxr-xr-x. 2 root root 6 Jun 10 2014 libexeclrwxrwxrwx 1 mysql mysql 46 Apr 4 14:15 mysql -> /usr/local/mysql-5.6.30-linux-glibc2.5-x86_64/drwxr-xr-x 13 mysql mysql 4096 Apr 29 16:01 mysql-5.6.30-linux-glibc2.5-x86_64drwxr-xr-x. 2 root root 6 Jun 10 2014 sbindrwxr-xr-x. 5 root root 46 Feb 6 01:26 sharelrwxrwxrwx 1 root root 25 Apr 29 16:00 sonarqube -> /usr/local/sonarqube-5.6/drwxr-xr-x 10 root root 111 Jun 1 2016 sonarqube-5.6lrwxrwxrwx 1 root root 31 Apr 29 17:53 sonar-scanner -> /usr/local/sonar-scanner-2.6.1/drwxr-xr-x 5 root root 37 Apr 29 17:52 sonar-scanner-2.6.1drwxr-xr-x. 2 root root 108 Apr 29 17:52 src[root@linux-node1 local]#
把sonar-scanner和sonarqube关联起来
[root@linux-node1 local]# cd sonar-scanner[root@linux-node1 sonar-scanner]# lltotal 0drwxr-xr-x 2 root root 92 May 12 2016 bindrwxr-xr-x 2 root root 37 May 12 2016 confdrwxr-xr-x 2 root root 40 May 12 2016 lib[root@linux-node1 sonar-scanner]# cd conf/[root@linux-node1 conf]# lltotal 4-rw-r--r-- 1 root root 775 May 12 2016 sonar-scanner.properties[root@linux-node1 conf]# pwd/usr/local/sonar-scanner/conf[root@linux-node1 conf]#
取消下面注释
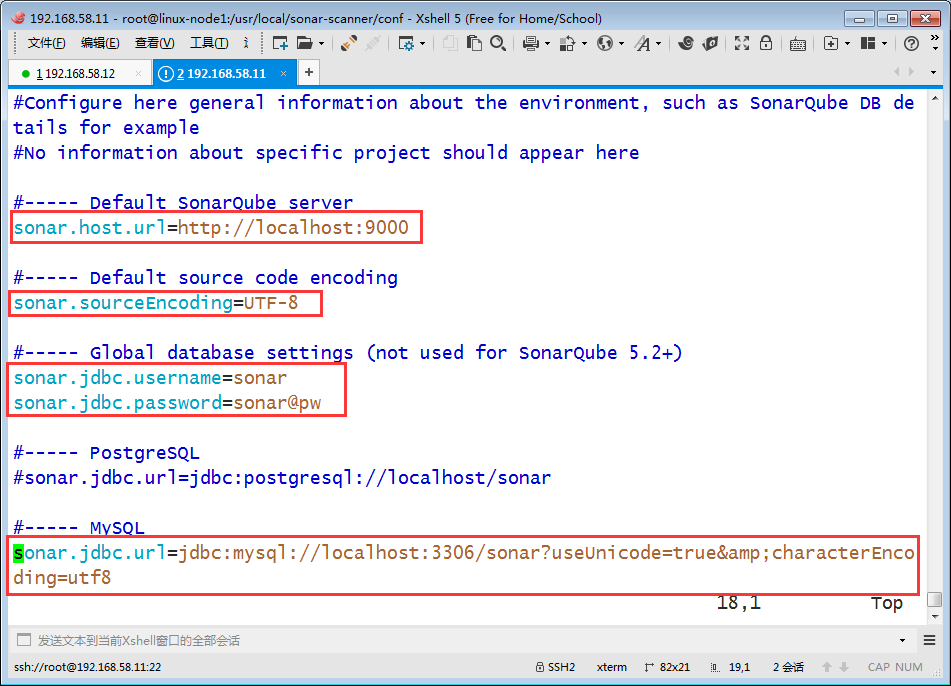
保存,退出
找一些代码 对它进行分析
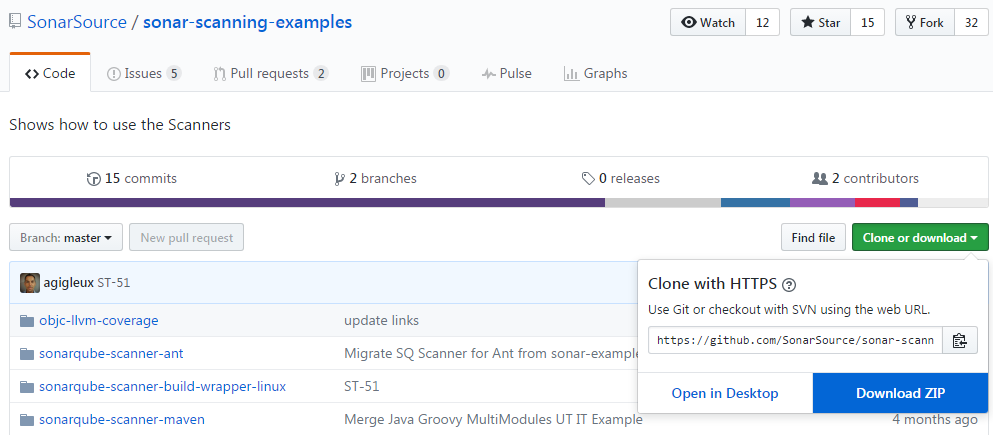
sonar官方提供了个样板包,有各种源的代码
打开下面地址
https://github.com/SonarSource找到下面东西
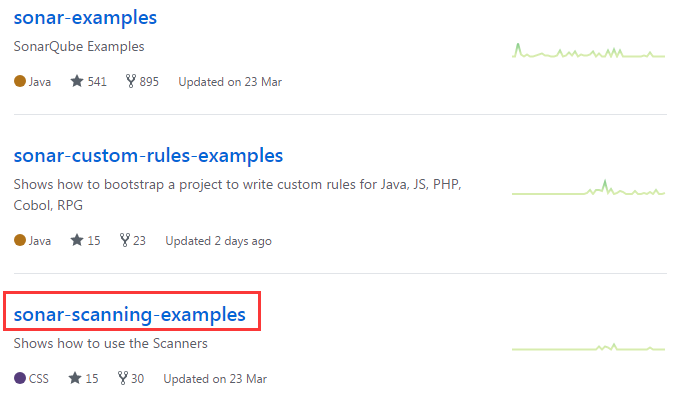

下载
上传并解压sonar-scanning-examples-master.zip
里面有很多语言
[root@linux-node1 ~]# lsanaconda-ks.cfg sonar-scanning-examples-masterks.cfg sonar-scanning-examples-master.zip[root@linux-node1 ~]# cd sonar-scanning-examples-master[root@linux-node1 sonar-scanning-examples-master]# lsobjc-llvm-coverage sonarqube-scanner-build-wrapper-linux swift-coveragesonarqube-scanner sonarqube-scanner-mavensonarqube-scanner-ant sonarqube-scanner-msbuild[root@linux-node1 sonar-scanning-examples-master]# cd sonarqube-scanner[root@linux-node1 sonarqube-scanner]# lscopybooks coverage-report sonar-project.properties src
下面可以看到很多源码
[root@linux-node1 src]# pwd/root/sonar-scanning-examples-master/sonarqube-scanner/src[root@linux-node1 src]# lltotal 0drwxr-xr-x 2 root root 46 Mar 23 18:26 abapdrwxr-xr-x 2 root root 25 Mar 23 18:26 coboldrwxr-xr-x 2 root root 39 Mar 23 18:26 cssdrwxr-xr-x 2 root root 33 Mar 23 18:26 directorydrwxr-xr-x 2 root root 22 Mar 23 18:26 erlangdrwxr-xr-x 2 root root 47 Mar 23 18:26 flexdrwxr-xr-x 2 root root 53 Mar 23 18:26 javadrwxr-xr-x 2 root root 22 Mar 23 18:26 javascriptdrwxr-xr-x 2 root root 49 Mar 23 18:26 packagedrwxr-xr-x 2 root root 21 Mar 23 18:26 phpdrwxr-xr-x 2 root root 73 Mar 23 18:26 plidrwxr-xr-x 2 root root 44 Mar 23 18:26 pythondrwxr-xr-x 2 root root 26 Mar 23 18:26 rpgdrwxr-xr-x 2 root root 75 Mar 23 18:26 samplesdrwxr-xr-x 2 root root 40 Mar 23 18:26 sqldrwxr-xr-x 2 root root 26 Mar 23 18:26 swiftdrwxr-xr-x 2 root root 59 Mar 23 18:26 vb6drwxr-xr-x 2 root root 25 Mar 23 18:26 webdrwxr-xr-x 2 root root 29 Mar 23 18:26 xml[root@linux-node1 src]#
查看配置文件
[root@linux-node1 sonarqube-scanner]# lltotal 8drwxr-xr-x 2 root root 75 Mar 23 18:26 copybooksdrwxr-xr-x 2 root root 39 Mar 23 18:26 coverage-report-rw-r--r-- 1 root root 647 Mar 23 18:26 sonar-project.propertiesdrwxr-xr-x 21 root root 4096 Mar 23 18:26 src
下面配置文件
项目里必须有上面这个配置文件,没有这个配置文件,无法对其进行扫描
[root@linux-node1 sonarqube-scanner]# cat sonar-project.properties sonar.projectKey=org.sonarqube:sonarqube-scannersonar.projectName=Example of SonarQube Scanner Usagesonar.projectVersion=1.0sonar.sources=src,copybookssonar.sourceEncoding=UTF-8## Cobol Specific Properties# comma-separated paths to directories with copybookssonar.cobol.copy.directories=copybooks# comma-separated list of suffixessonar.cobol.file.suffixes=cbl,cpysonar.cobol.copy.suffixes=cpy## Flex Specific Properties# retrieve code coverage data from the Cobertura reportsonar.flex.cobertura.reportPath=coverage-report/coverage-cobertua-flex.xml# PL/I Specific Propertiessonar.pli.marginLeft=2sonar.pli.marginRight=0[root@linux-node1 sonarqube-scanner]#
样例最新的地址
进行扫描
[root@linux-node1 sonarqube-scanner]# /usr/local/sonar-scanner/bin/sonar-scanner INFO: Scanner configuration file: /usr/local/sonar-scanner/conf/sonar-scanner.propertiesINFO: Project root configuration file: /root/sonar-scanning-examples-master/sonarqube-scanner/sonar-project.propertiesINFO: SonarQube Scanner 2.6.1INFO: Java 1.8.0_131 Oracle Corporation (64-bit)INFO: Linux 3.10.0-229.el7.x86_64 amd64INFO: User cache: /root/.sonar/cacheINFO: Load global repositoriesINFO: Load global repositories (done) | time=153msWARN: Property 'sonar.jdbc.url' is not supported any more. It will be ignored. There is no longer any DB connection to the SQ database.WARN: Property 'sonar.jdbc.username' is not supported any more. It will be ignored. There is no longer any DB connection to the SQ database.WARN: Property 'sonar.jdbc.password' is not supported any more. It will be ignored. There is no longer any DB connection to the SQ database.INFO: User cache: /root/.sonar/cacheINFO: Load plugins indexINFO: Load plugins index (done) | time=32msINFO: Plugin [l10nzh] defines 'l10nen' as base plugin. This metadata can be removed from manifest of l10n plugins since version 5.2.INFO: SonarQube server 5.6INFO: Default locale: "en_US", source code encoding: "UTF-8"INFO: Process project propertiesINFO: Load project repositoriesINFO: Load project repositories (done) | time=33msINFO: Load quality profilesINFO: Load quality profiles (done) | time=49msINFO: Load active rulesINFO: Load active rules (done) | time=582msWARN: SCM provider autodetection failed. No SCM provider claims to support this project. Please use sonar.scm.provider to define SCM of your project.INFO: Publish modeINFO: ------------- Scan Example of SonarQube Scanner UsageINFO: Load server rulesINFO: Load server rules (done) | time=124msINFO: Base dir: /root/sonar-scanning-examples-master/sonarqube-scannerINFO: Working dir: /root/sonar-scanning-examples-master/sonarqube-scanner/.sonarINFO: Source paths: src, copybooksINFO: Source encoding: UTF-8, default locale: en_USINFO: Index filesINFO: 13 files indexedINFO: Quality profile for java: Sonar wayINFO: Quality profile for js: Sonar wayINFO: Quality profile for php: Sonar wayINFO: Quality profile for py: Sonar wayINFO: JaCoCoSensor: JaCoCo report not found : /root/sonar-scanning-examples-master/sonarqube-scanner/target/jacoco.execINFO: JaCoCoItSensor: JaCoCo IT report not found: /root/sonar-scanning-examples-master/sonarqube-scanner/target/jacoco-it.execINFO: Sensor JavaSquidSensorINFO: Configured Java source version (sonar.java.source): noneINFO: JavaClasspath initialization...WARN: Bytecode of dependencies was not provided for analysis of source files, you might end up with less precise results. Bytecode can be provided using sonar.java.libraries propertyINFO: JavaClasspath initialization done: 1 msINFO: JavaTestClasspath initialization...WARN: Bytecode of dependencies was not provided for analysis of test files, you might end up with less precise results. Bytecode can be provided using sonar.java.test.libraries propertyINFO: JavaTestClasspath initialization done: 1 msINFO: Java Main Files AST scan...INFO: 2 source files to be analyzedINFO: Java Main Files AST scan done: 639 msWARN: Java bytecode has not been made available to the analyzer. The org.sonar.java.bytecode.visitor.DependenciesVisitor@26e0d39c, org.sonar.java.checks.unused.UnusedPrivateMethodCheck@56382bc9 are disabled.INFO: Java Test Files AST scan...INFO: 2/2 source files have been analyzedINFO: 0 source files to be analyzedINFO: Java Test Files AST scan done: 5 msINFO: Sensor JavaSquidSensor (done) | time=1306msINFO: Sensor Lines SensorINFO: 0/0 source files have been analyzedINFO: Sensor Lines Sensor (done) | time=6msINFO: Sensor PythonXUnitSensorINFO: Sensor PythonXUnitSensor (done) | time=24msINFO: Sensor SurefireSensorINFO: parsing /root/sonar-scanning-examples-master/sonarqube-scanner/target/surefire-reportsINFO: Sensor SurefireSensor (done) | time=7msINFO: Sensor JavaScriptSquidSensorINFO: 1 source files to be analyzedINFO: Sensor JavaScriptSquidSensor (done) | time=486msINFO: Sensor SCM SensorINFO: No SCM system was detected. You can use the 'sonar.scm.provider' property to explicitly specify it.INFO: Sensor SCM Sensor (done) | time=0msINFO: Sensor Python Squid SensorINFO: 1/1 source files have been analyzedINFO: Python unit test coverageINFO: Python integration test coverageINFO: Python overall test coverageINFO: Sensor Python Squid Sensor (done) | time=384msINFO: Sensor PHP sensorINFO: 1 source files to be analyzedINFO: 1/1 source files have been analyzedINFO: No PHPUnit test report provided (see 'sonar.php.tests.reportPath' property)INFO: No PHPUnit unit test coverage report provided (see 'sonar.php.coverage.reportPath' property)INFO: No PHPUnit integration test coverage report provided (see 'sonar.php.coverage.itReportPath' property)INFO: No PHPUnit overall coverage report provided (see 'sonar.php.coverage.overallReportPath' property)INFO: Sensor PHP sensor (done) | time=717msINFO: Sensor Analyzer for "php.ini" filesINFO: Sensor Analyzer for "php.ini" files (done) | time=3msINFO: Sensor org.sonar.plugins.javascript.lcov.UTCoverageSensorINFO: Sensor org.sonar.plugins.javascript.lcov.UTCoverageSensor (done) | time=0msINFO: Sensor org.sonar.plugins.javascript.lcov.ITCoverageSensorINFO: Sensor org.sonar.plugins.javascript.lcov.ITCoverageSensor (done) | time=0msINFO: Sensor Zero Coverage SensorINFO: Sensor Zero Coverage Sensor (done) | time=36msINFO: Sensor Code Colorizer SensorINFO: Sensor Code Colorizer Sensor (done) | time=1msINFO: Sensor CPD Block IndexerINFO: JavaCpdBlockIndexer is used for javaINFO: DefaultCpdBlockIndexer is used for jsINFO: DefaultCpdBlockIndexer is used for phpINFO: DefaultCpdBlockIndexer is used for pyINFO: Sensor CPD Block Indexer (done) | time=81msINFO: Calculating CPD for 7 filesINFO: CPD calculation finishedINFO: Analysis report generated in 108ms, dir size=64 KBINFO: Analysis reports compressed in 40ms, zip size=38 KBINFO: Analysis report uploaded in 298msINFO: ANALYSIS SUCCESSFUL, you can browse http://localhost:9000/dashboard/index/org.sonarqube:sonarqube-scannerINFO: Note that you will be able to access the updated dashboard once the server has processed the submitted analysis reportINFO: More about the report processing at http://localhost:9000/api/ce/task?id=AVu6Wsaeyj9VSYmN4Z_CINFO: ------------------------------------------------------------------------INFO: EXECUTION SUCCESSINFO: ------------------------------------------------------------------------INFO: Total time: 9.136sINFO: Final Memory: 51M/252MINFO: ------------------------------------------------------------------------
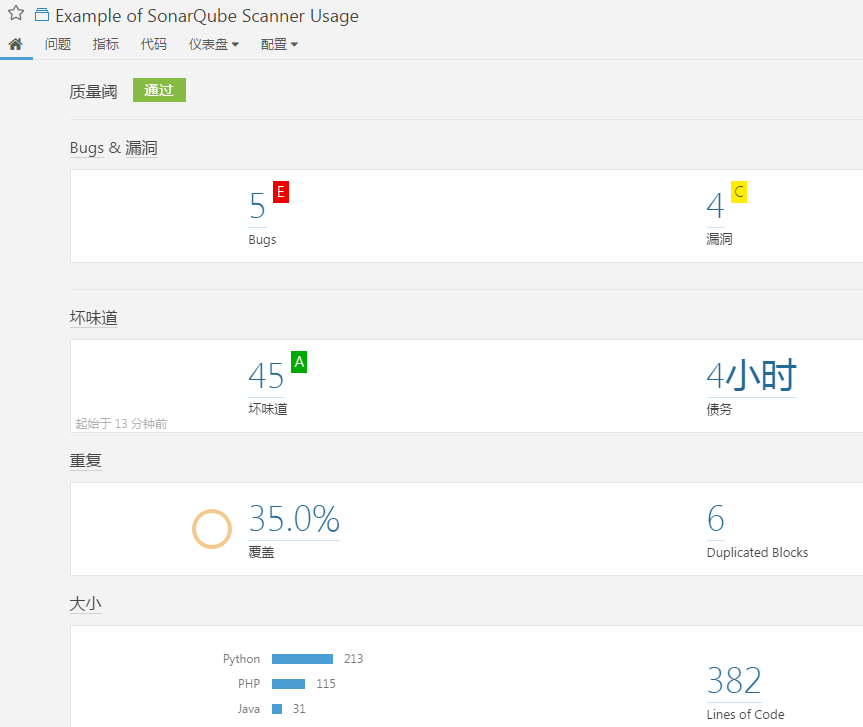
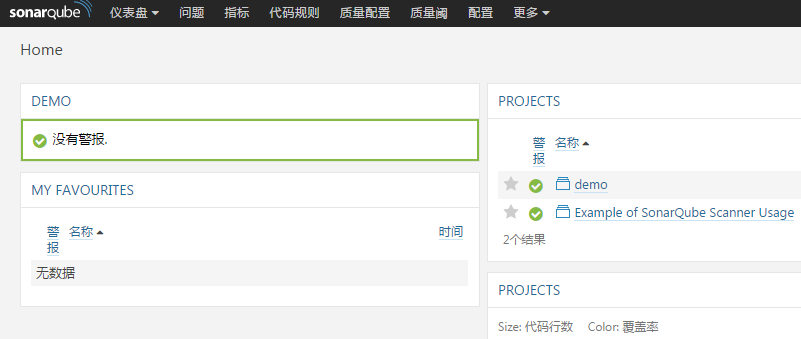
网页上查看扫描报告

网页上显示的名称和配置文件配置的名称一样
[root@linux-node1 sonarqube-scanner]# cat sonar-project.properties sonar.projectKey=org.sonarqube:sonarqube-scannersonar.projectName=Example of SonarQube Scanner Usagesonar.projectVersion=1.0

点击进去
右边是自己已经下载的插件,然后才会匹配代码

点开重复的

继续点开可以看到重复的块

它会把重复的部分标识出来

jenkins要集成sonar,要装插件
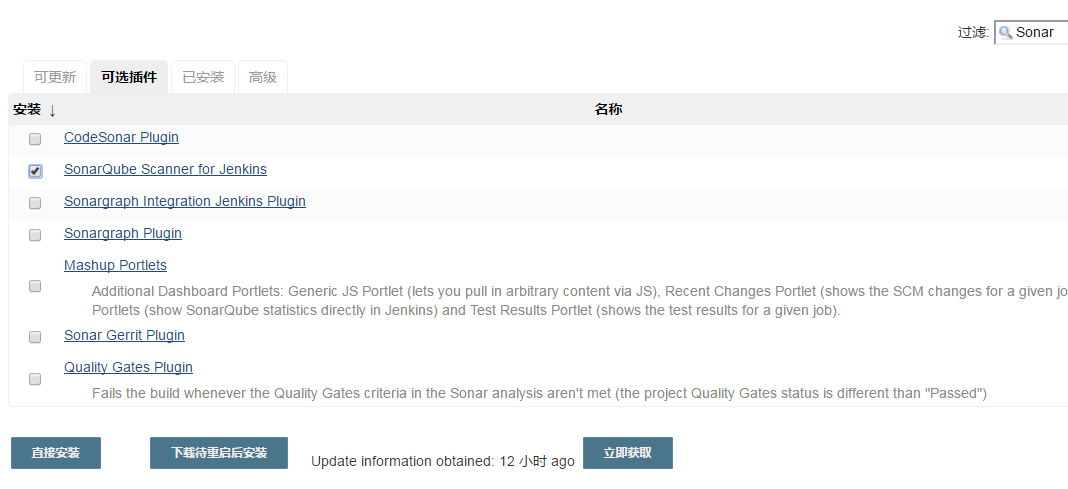
它会把依赖安装上

Jenkins实战Sonar与Jenkins结合

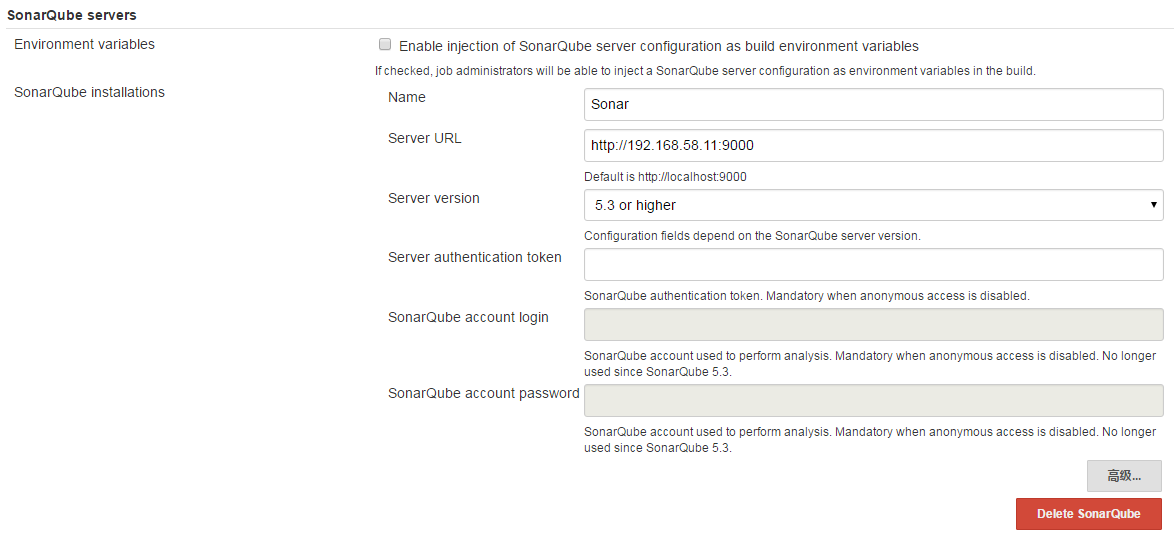
这里可以看到sonar的配置

点击下面
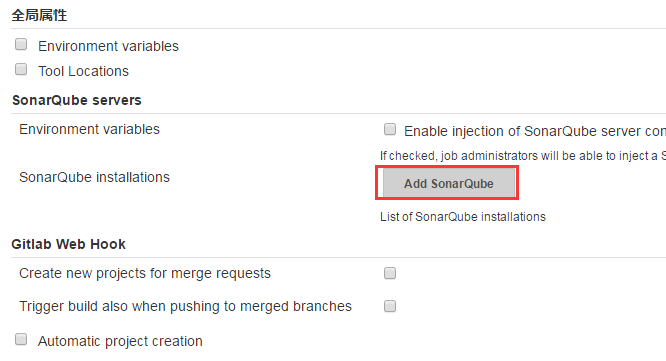
相关配置项
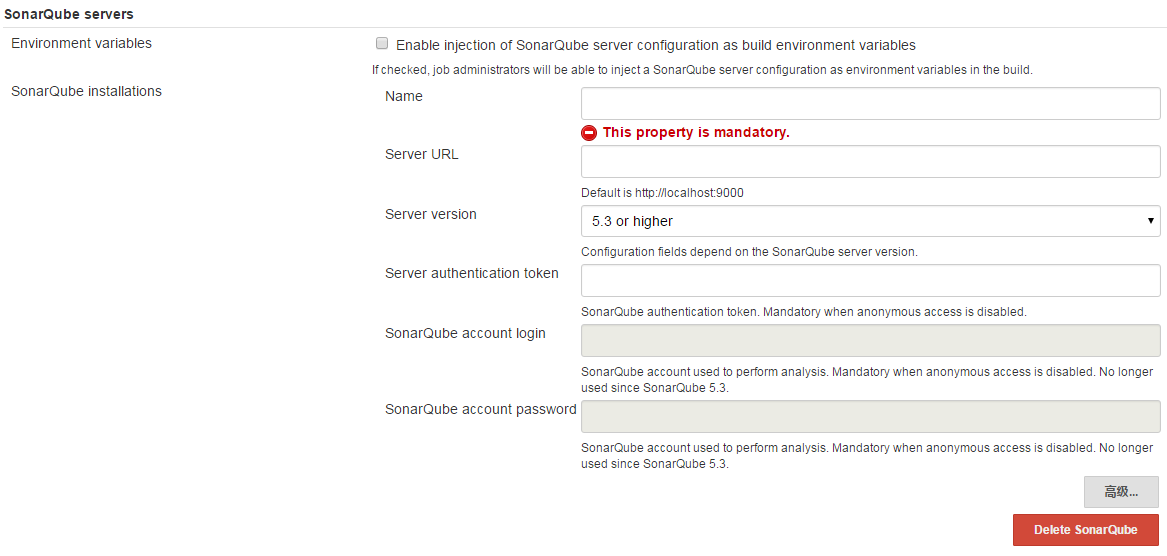
先填这些信息,保存
系统管理---全局工具配置

找到扫描器的配置
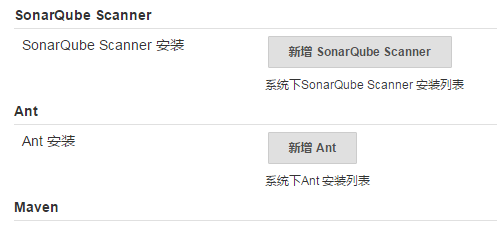
取消自动安装,到这里意识到sonar Scanner要和jenkins装一个机器上

之前安装在了node1上,需要把它迁移到node2上,和jenkins在一个机器上
[root@linux-node1 local]# cd /usr/local/[root@linux-node1 local]# lltotal 4drwxr-xr-x. 2 root root 6 Jun 10 2014 bindrwxr-xr-x. 2 root root 6 Jun 10 2014 etcdrwxr-xr-x. 2 root root 6 Jun 10 2014 gamesdrwxr-xr-x. 2 root root 6 Jun 10 2014 includedrwxr-xr-x. 2 root root 6 Jun 10 2014 libdrwxr-xr-x. 2 root root 6 Jun 10 2014 lib64drwxr-xr-x. 2 root root 6 Jun 10 2014 libexeclrwxrwxrwx 1 mysql mysql 46 Apr 4 14:15 mysql -> /usr/local/mysql-5.6.30-linux-glibc2.5-x86_64/drwxr-xr-x 13 mysql mysql 4096 Apr 30 14:55 mysql-5.6.30-linux-glibc2.5-x86_64drwxr-xr-x. 2 root root 6 Jun 10 2014 sbindrwxr-xr-x. 5 root root 46 Feb 6 01:26 sharelrwxrwxrwx 1 root root 25 Apr 29 16:00 sonarqube -> /usr/local/sonarqube-5.6/drwxr-xr-x 10 root root 111 Jun 1 2016 sonarqube-5.6lrwxrwxrwx 1 root root 31 Apr 29 17:53 sonar-scanner -> /usr/local/sonar-scanner-2.6.1/drwxr-xr-x 5 root root 37 Apr 29 17:52 sonar-scanner-2.6.1drwxr-xr-x. 2 root root 108 Apr 29 17:52 src[root@linux-node1 local]#
把整个目录拷贝过去
[root@linux-node1 local]# rsync -az sonar-scanner-2.6.1 192.168.58.12:/usr/local/root@192.168.58.12's password: [root@linux-node1 local]#
node2上检查,并创建软链接
[root@linux-node2 ~]# cd /usr/local/[root@linux-node2 local]# lltotal 4drwxr-xr-x. 2 root root 6 Jun 10 2014 bindrwxr-xr-x. 2 root root 6 Jun 10 2014 etcdrwxr-xr-x. 2 root root 6 Jun 10 2014 gamesdrwxr-xr-x. 2 root root 6 Jun 10 2014 includedrwxr-xr-x. 2 root root 6 Jun 10 2014 libdrwxr-xr-x. 2 root root 6 Jun 10 2014 lib64drwxr-xr-x. 2 root root 6 Jun 10 2014 libexeclrwxrwxrwx 1 mysql mysql 35 Apr 9 16:50 mysql -> mysql-5.6.30-linux-glibc2.5-x86_64/drwxr-xr-x 13 mysql mysql 4096 Apr 9 20:56 mysql-5.6.30-linux-glibc2.5-x86_64drwxr-xr-x. 2 root root 6 Jun 10 2014 sbindrwxr-xr-x. 5 root root 46 Feb 6 01:26 sharedrwxr-xr-x 5 root root 37 Apr 29 17:52 sonar-scanner-2.6.1drwxr-xr-x. 2 root root 54 Apr 9 16:50 src[root@linux-node2 local]# ln -s sonar-scanner-2.6.1 sonar-scanner[root@linux-node2 local]# lltotal 4drwxr-xr-x. 2 root root 6 Jun 10 2014 bindrwxr-xr-x. 2 root root 6 Jun 10 2014 etcdrwxr-xr-x. 2 root root 6 Jun 10 2014 gamesdrwxr-xr-x. 2 root root 6 Jun 10 2014 includedrwxr-xr-x. 2 root root 6 Jun 10 2014 libdrwxr-xr-x. 2 root root 6 Jun 10 2014 lib64drwxr-xr-x. 2 root root 6 Jun 10 2014 libexeclrwxrwxrwx 1 mysql mysql 35 Apr 9 16:50 mysql -> mysql-5.6.30-linux-glibc2.5-x86_64/drwxr-xr-x 13 mysql mysql 4096 Apr 9 20:56 mysql-5.6.30-linux-glibc2.5-x86_64drwxr-xr-x. 2 root root 6 Jun 10 2014 sbindrwxr-xr-x. 5 root root 46 Feb 6 01:26 sharelrwxrwxrwx 1 root root 19 Apr 30 15:16 sonar-scanner -> sonar-scanner-2.6.1drwxr-xr-x 5 root root 37 Apr 29 17:52 sonar-scanner-2.6.1drwxr-xr-x. 2 root root 54 Apr 9 16:50 src[root@linux-node2 local]#
这2个地方改了
[root@linux-node2 conf]# pwd/usr/local/sonar-scanner/conf[root@linux-node2 conf]# lltotal 4-rw-r--r-- 1 root root 781 Apr 30 15:24 sonar-scanner.properties[root@linux-node2 conf]# vim sonar-scanner.properties

保存

现在只做到源码管理,没构建

这里面就有所有你能干的活


Analysis properties这里填的是下面配置文件的内容,复制进去
[root@linux-node1 ~]# cd sonar-scanning-examples-master[root@linux-node1 sonar-scanning-examples-master]# cd sonarqube-scanner[root@linux-node1 sonarqube-scanner]# lltotal 8drwxr-xr-x 2 root root 75 Mar 23 18:26 copybooksdrwxr-xr-x 2 root root 39 Mar 23 18:26 coverage-report-rw-r--r-- 1 root root 647 Mar 23 18:26 sonar-project.propertiesdrwxr-xr-x 21 root root 4096 Mar 23 18:26 src[root@linux-node1 sonarqube-scanner]# cat sonar-project.properties sonar.projectKey=org.sonarqube:sonarqube-scannersonar.projectName=Example of SonarQube Scanner Usagesonar.projectVersion=1.0sonar.sources=src,copybookssonar.sourceEncoding=UTF-8## Cobol Specific Properties# comma-separated paths to directories with copybookssonar.cobol.copy.directories=copybooks# comma-separated list of suffixessonar.cobol.file.suffixes=cbl,cpysonar.cobol.copy.suffixes=cpy## Flex Specific Properties# retrieve code coverage data from the Cobertura reportsonar.flex.cobertura.reportPath=coverage-report/coverage-cobertua-flex.xml# PL/I Specific Propertiessonar.pli.marginLeft=2sonar.pli.marginRight=0[root@linux-node1 sonarqube-scanner]#
把下面
sonar.projectKey=org.sonarqube:sonarqube-scannersonar.projectName=Example of SonarQube Scanner Usagesonar.projectVersion=1.0sonar.sources=src,copybookssonar.sourceEncoding=UTF-8sonar.cobol.copy.directories=copybookssonar.cobol.file.suffixes=cbl,cpysonar.cobol.copy.suffixes=cpysonar.flex.cobertura.reportPath=coverage-report/coverage-cobertua-flex.xmlsonar.pli.marginLeft=2sonar.pli.marginRight=0
改成
sonar.projectKey=demosonar.projectName=demosonar.projectVersion=1.0sonar.sources=./sonar.sourceEncoding=UTF-8sonar.cobol.copy.directories=copybookssonar.cobol.file.suffixes=cbl,cpysonar.cobol.copy.suffixes=cpysonar.flex.cobertura.reportPath=coverage-report/coverage-cobertua-flex.xmlsonar.pli.marginLeft=2sonar.pli.marginRight=0
复制进去

其它区域都不填写,先保存

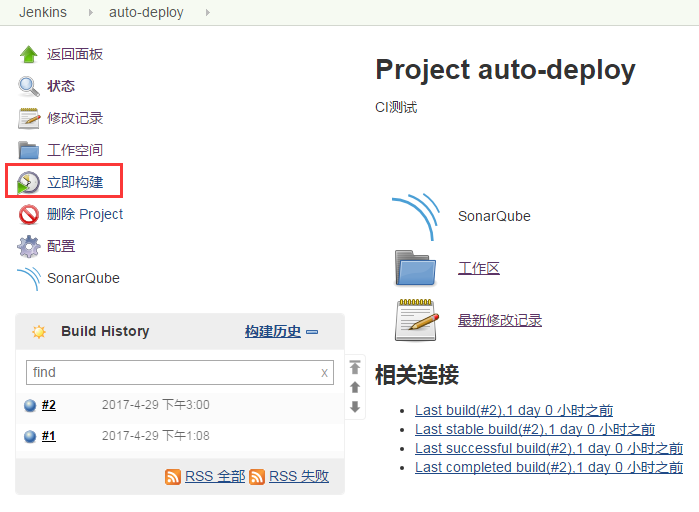
右边多了个快捷方式

点击立即构建
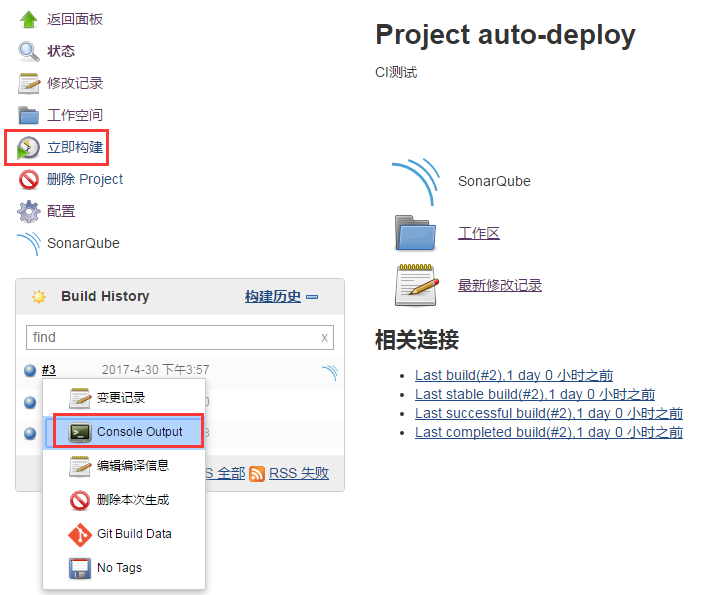
查看控制台输出
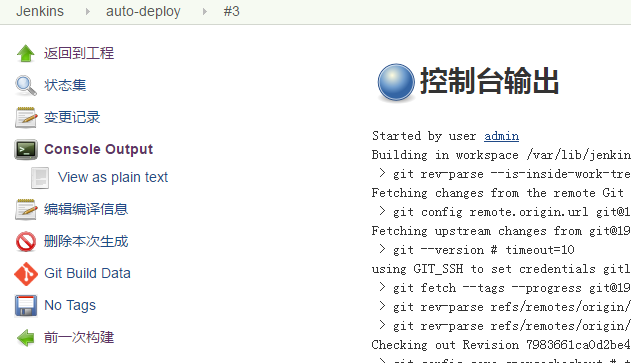
一些输出

这里配置文件就以参数的形式传输给它了
[auto-deploy] $ /usr/local/sonar-scanner/bin/sonar-scanner -e -Dsonar.host.url=http://192.168.58.11:9000 -Dsonar.sourceEncoding=UTF-8 -Dsonar.cobol.copy.directories=copybooks -Dsonar.sources=./ -Dsonar.pli.marginRight=0 -Dsonar.projectVersion=1.0 -Dsonar.projectKey=demo -Dsonar.cobol.file.suffixes=cbl,cpy -Dsonar.flex.cobertura.reportPath=coverage-report/coverage-cobertua-flex.xml -Dsonar.cobol.copy.suffixes=cpy -Dsonar.pli.marginLeft=2 -Dsonar.projectName=demo -Dsonar.projectBaseDir=/var/lib/jenkins/workspace/auto-deploy
返回到工程,点击进去


你可以改仪表盘显示

配置控件

你可以添加代码覆盖率的控件
选一个项目demo

保存
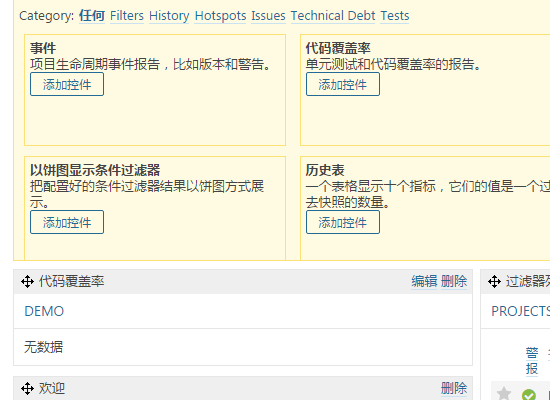
你也可以把欢迎删除了


返回仪表盘
jenkins继续编辑配置

还可以设置构建后操作

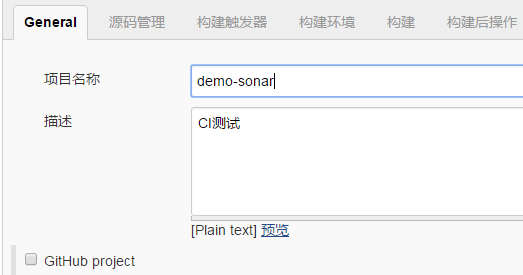
把项目名改成demo-sonar
再次立即构建

Jenkins实战-Job关联和Pipeline
新建一个项目


构建,这里选择执行shell

想先看看jenkins是以什么用户执行的

保存之后,点击立即构建

查看控制台,看到它以jenkins用户执行的

这就有问题了。部署机是192.168.58.11 是node1,使用的是www用户
jenkins在node2上
生产中,jenkins很多情况下和部署机器也不在一台
[root@linux-node1 src]# su - wwwLast login: Sat Apr 29 14:00:45 CST 2017 on pts/0[www@linux-node1 ~]$ cd /scripts/[www@linux-node1 scripts]$ ./deploy_all.sh Usage: ./deploy_all.sh { deploy | rollback [ list |version ]}[www@linux-node1 scripts]$ ./deploy_all.sh deployAlready up-to-date.code_buildweb-demo_798366_2017-04-30-17-09-00.tar.gz 100% 9059 8.9KB/s 00:00 web-demo_798366_2017-04-30-17-09-00.tar.gz 100% 9059 8.9KB/s 00:00 test error[www@linux-node1 scripts]$ vim deploy_all.sh [www@linux-node1 scripts]$ ./deploy_all.sh deployAlready up-to-date.code_buildweb-demo_798366_2017-04-30-17-09-49.tar.gz 100% 9055 8.8KB/s 00:00 web-demo_798366_2017-04-30-17-09-49.tar.gz 100% 9055 8.8KB/s 00:00 192.168.58.12.crontab.xml 100% 21 0.0KB/s 00:00 HTTP/1.1 200 OKadd to cluster[www@linux-node1 scripts]$ 通过下面方式可以做到

但是需要配置密钥认证
拷贝公钥过去
[root@linux-node2 ~]# cat .ssh/id_rsa.pub ssh-rsa AAAAB3NzaC1yc2EAAAADAQABAAABAQCz0QBxB9kIv8H6Uxe+clLvM99/7QOYTCVZzQKb0Q9Song1Yy9oryCcYWHogN30j80Ctbybu+3PAh4VIfz4SjY1tNd/Dv2Il3caz+5chvX0OLDJCNl2w+Du7HjwdyszlzVc1rP4QTL/yYvrUz1fgBonRKa0/Y5CK7jEzQZ1+ZMuN/E/ubrDX5FIp0jfPPnbtTryWW8BMloOb+Q8EFKnaI6Wbyx9JzslOIawCkM77LL9RhxMbQ6A3QoUHozmlFnhfu7AXnhfCdPb02xx4RCOAFoY9pEtOH+eHzT7/SQVf8VzEYO1vIe4TDP6sNN40/1pjUdBPcGiBMidM6pLk/j6CaxV root@linux-node2.nmap.com[root@linux-node2 ~]# [www@linux-node1 scripts]$ cd[www@linux-node1 ~]$ vim .ssh/authorized_keys [www@linux-node1 ~]$

测试
[root@linux-node2 ~]# ssh www@192.168.58.11Last login: Sun Apr 30 17:08:50 2017[www@linux-node1 ~]$
先保存下

点击立即构建,它会失败

提示权限不足

给它sudo权限

构建这里加上sudo
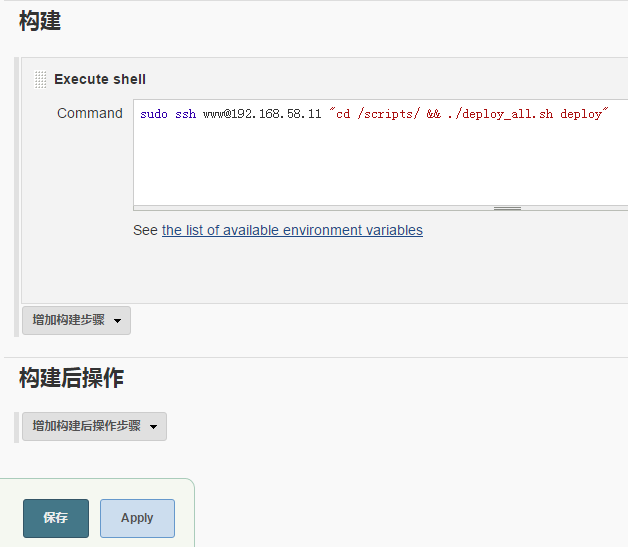
保存之后执行还是不可以

把这里加上注释,不让它需要tty

再次构建

执行成功

ls -lrt 检查
drwxrwxr-x 3 www www 69 Apr 30 17:09 web-demo_798366_2017-04-30-17-09-49-rw-rw-r-- 1 www www 9063 Apr 30 20:06 web-demo_798366_2017-04-30-20-06-29.tar.gzdrwxrwxr-x 3 www www 69 Apr 30 20:06 web-demo_798366_2017-04-30-20-06-29[root@linux-node2 webroot]#
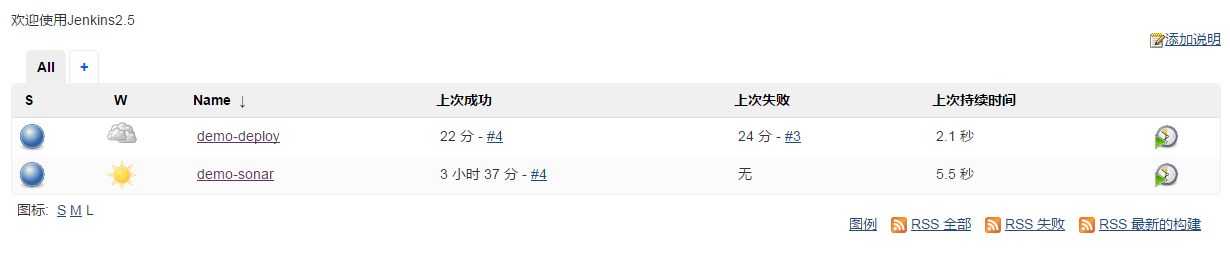
现在我们有2个,一个是代码质量的,一个是自动部署脚本的
显示阴天的是因为之前执行失败过。有提示

开始学钩子脚本
这边一提交(push),这边自动构建一遍
jenkins安装此插件
它是一个触发器插件

直接安装

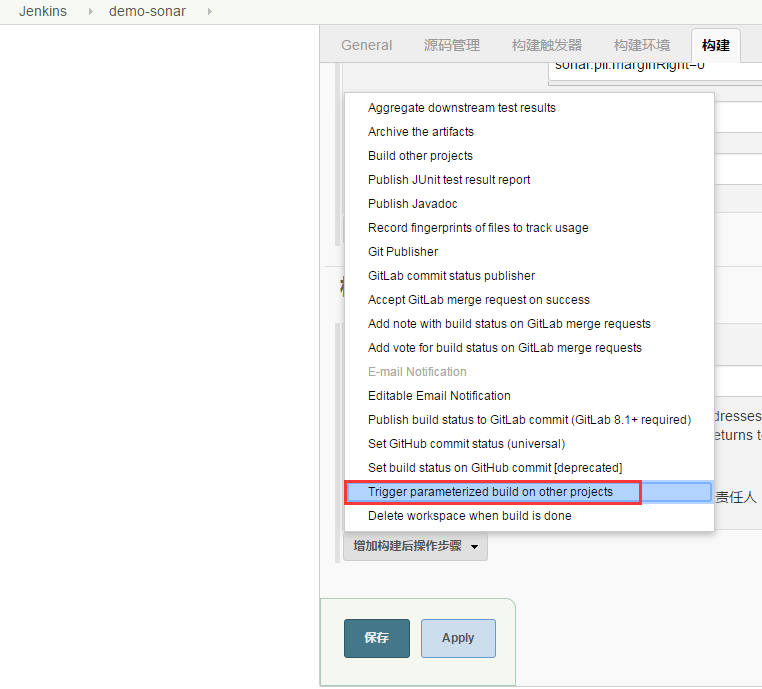
在demo-sonar项目选择下面插件
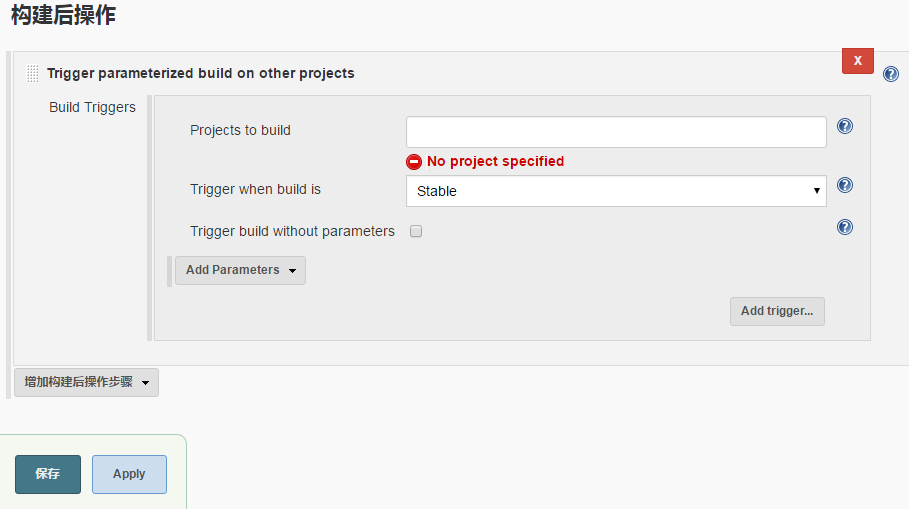
这里选择下一个任务(项目)的名称

搜索即可,出现demo-deploy

没有参数,勾上
保存

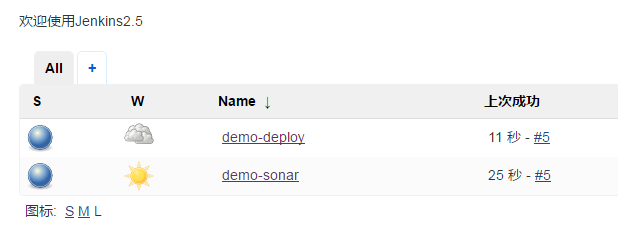
现在的话,你要是构建demo-sonar,它就会构建demo-deploy
验证下看看
demo-sonar项目,立即构建

看到项目这里也自动执行了。11秒前
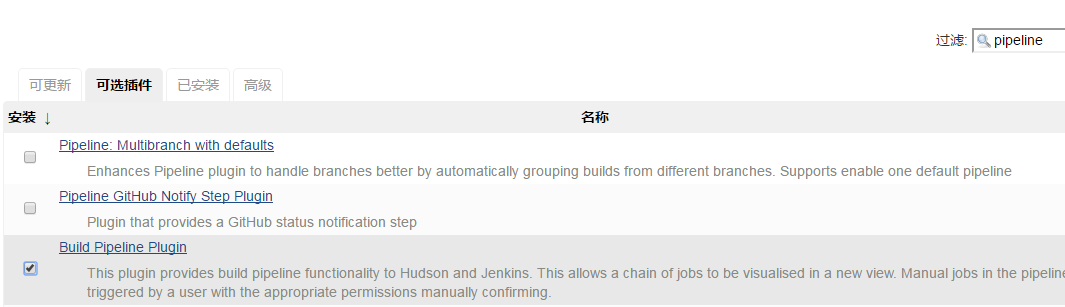
安装学习piplines插件
代码流水线插件,它会执行一系列操作
安装构建插件
使用它,点击选中的加号,新建一个视图

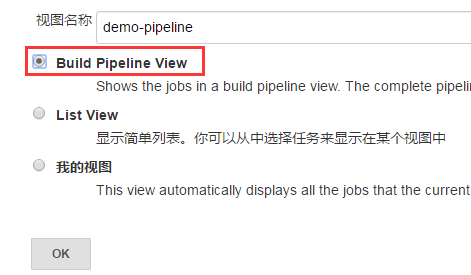
点击OK之后,弹出如下视图

选择初始化的job
显示最近5次的构建

点击保存

点击保存之后显示的

点击run

刷新下也看到右边执行了
点下面按钮可以看到控制台输出的快捷方式


Jenkins实战-Jenkins与gitlab集成(Webhook)
现在想实现一个功能,代码提交,push到gitlab上
jenkins自动帮你构建
[www@linux-node1 ~]$ cd web-demo/[www@linux-node1 web-demo]$ lltotal 8-rw-rw-r-- 1 www www 26 Apr 28 22:20 index.html-rw-rw-r-- 1 www www 9 Apr 28 21:53 README.md[www@linux-node1 web-demo]$
先安装gitlab的钩子脚本
钩子插件已经安装了

配置钩子脚本
先在这里配置

勾选这2个
第二个是当gitlab进行发布的时候,对它进行build
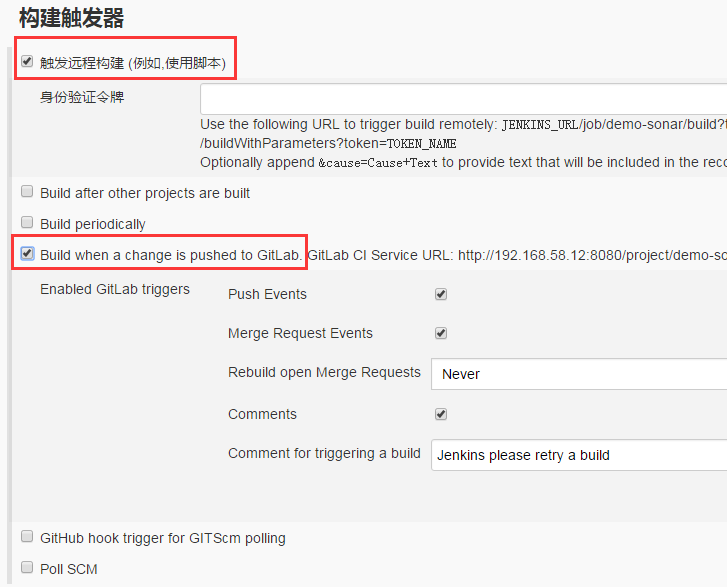
它告诉你,你要在gitlab上填上下面这个url

有一个身份认证的东西
需要再装一个插件才能实现认证
先保存了
安装下面插件


只有装了它才能使用身份验证令牌的方式,让双方验证
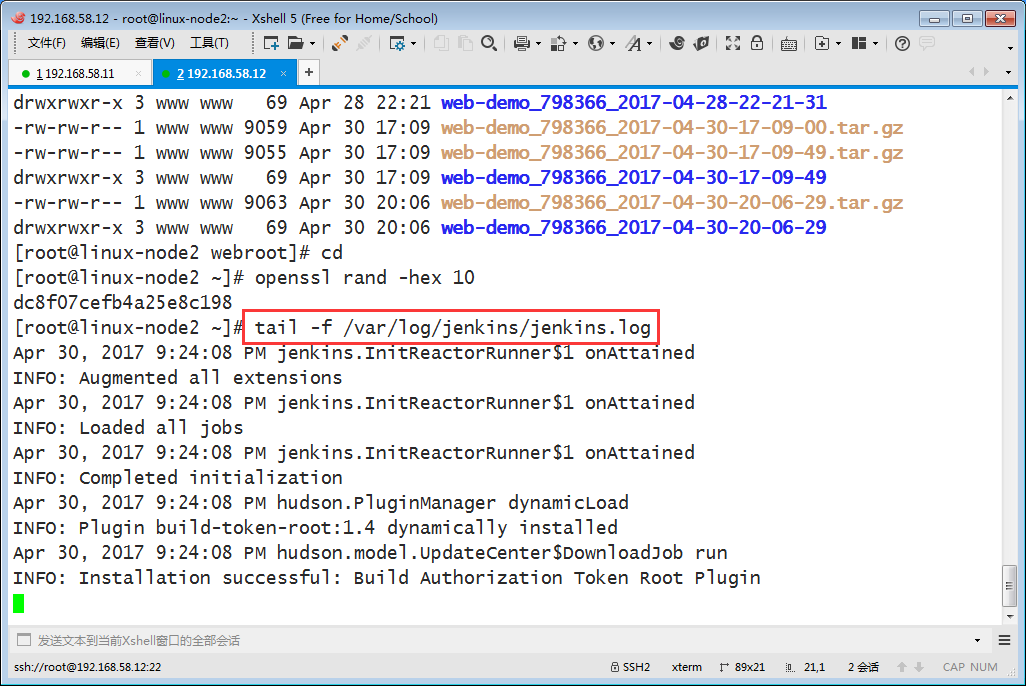
生成一个token
[root@linux-node2 ~]# openssl rand -hex 10dc8f07cefb4a25e8c198[root@linux-node2 ~]#
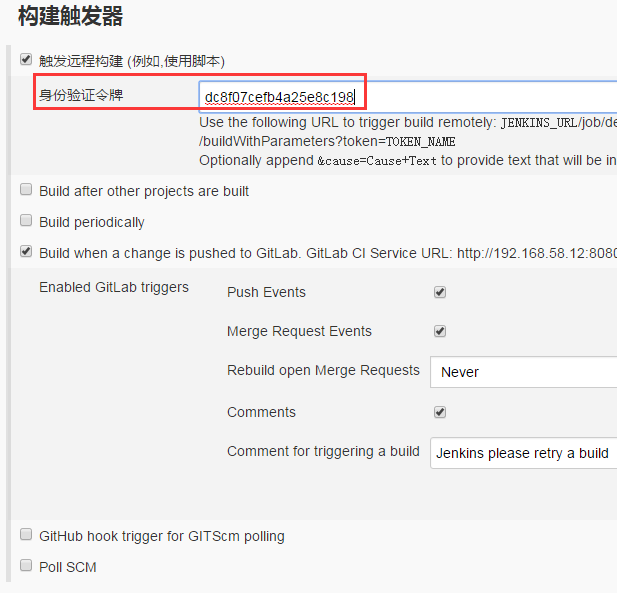
保存
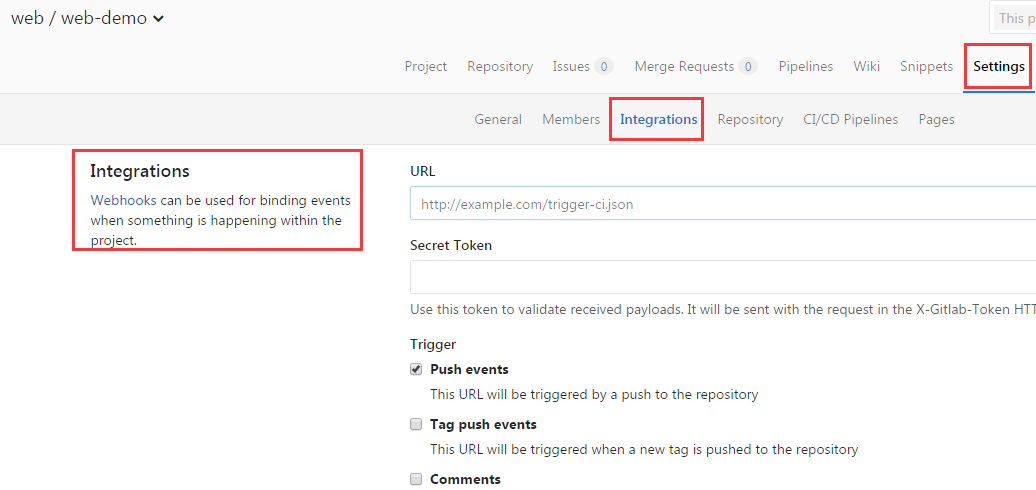
在gitlab上添加这个钩子脚本
登录gitlab
在这个项目下找到钩子配置的地方
打开它的wiki


下面告诉你了使用办法

格式如下
buildByToken/build?job=RevolutionTest&token=TacoTuesday
http://192.168.58.12:8080/project/demo-sonar
整合下http://192.168.58.12:8080/buildByToken/build?job=demo-sonar&token=dc8f07cefb4a25e8c198job的名称不能错,token也不能错 gitlab上此项目添加好url

点击add

add之后

准备测试,这边先打开日志
页面上test一下

成功调用

日志也刷出来了

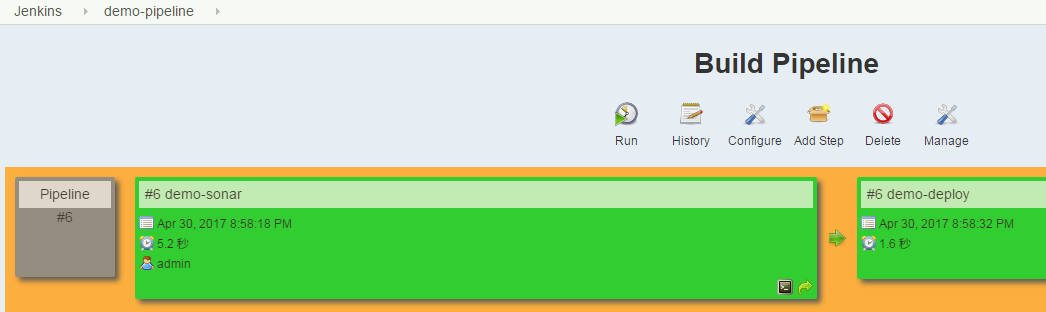
打开jenkins的pipeline页面,也能看到成功调用

模拟生产环境,写个代码,git push之后看看他能否执行
[www@linux-node1 web-demo]$ pwd/home/www/web-demo[www@linux-node1 web-demo]$ lltotal 8-rw-rw-r-- 1 www www 26 Apr 28 22:20 index.html-rw-rw-r-- 1 www www 9 Apr 28 21:53 README.md[www@linux-node1 web-demo]$ cat index.html hehehehheheheversion 2.0[www@linux-node1 web-demo]$ echo "test jenkins">>index.html [www@linux-node1 web-demo]$ cat index.html hehehehheheheversion 2.0test jenkins[www@linux-node1 web-demo]$
提交到gitlab上
[www@linux-node1 web-demo]$ git add *[www@linux-node1 web-demo]$ git commit -m "jenkins hook test"[master bd2b985] jenkins hook test 1 file changed, 1 insertion(+)[www@linux-node1 web-demo]$ git pushwarning: push.default is unset; its implicit value is changing inGit 2.0 from 'matching' to 'simple'. To squelch this messageand maintain the current behavior after the default changes, use: git config --global push.default matchingTo squelch this message and adopt the new behavior now, use: git config --global push.default simpleSee 'git help config' and search for 'push.default' for further information.(the 'simple' mode was introduced in Git 1.7.11. Use the similar mode'current' instead of 'simple' if you sometimes use older versions of Git)Counting objects: 5, done.Delta compression using up to 4 threads.Compressing objects: 100% (2/2), done.Writing objects: 100% (3/3), 304 bytes | 0 bytes/s, done.Total 3 (delta 0), reused 0 (delta 0)To git@192.168.58.11:web/web-demo.git 7983661..bd2b985 master -> master[www@linux-node1 web-demo]$
在jenkins页面上看到执行了

打开node2页面,看到页面是最新的了

最好再配置一个构建后操作,它会在构建失败后执行
比如配置构建后发邮件操作
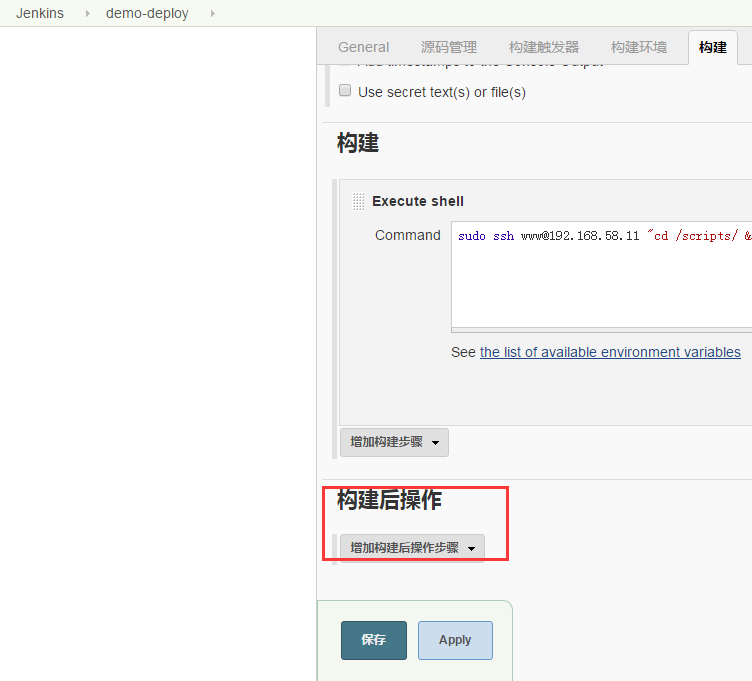
这里面缺少自动化测试
你可以在部署后面放一个测试的脚本
比如添加一个demo-test